-
Main / List of articles / What does the export .html file consist of?
Adobe Animate. What does the export .html file consist of and in what places can it be filled with scripts and tags?
This article will review the export file for an HTML banner. Here I will describe the techniques that I use when developing banners and leave notes that will help in the future fill out the export file to meet any technical requirements of the sites.
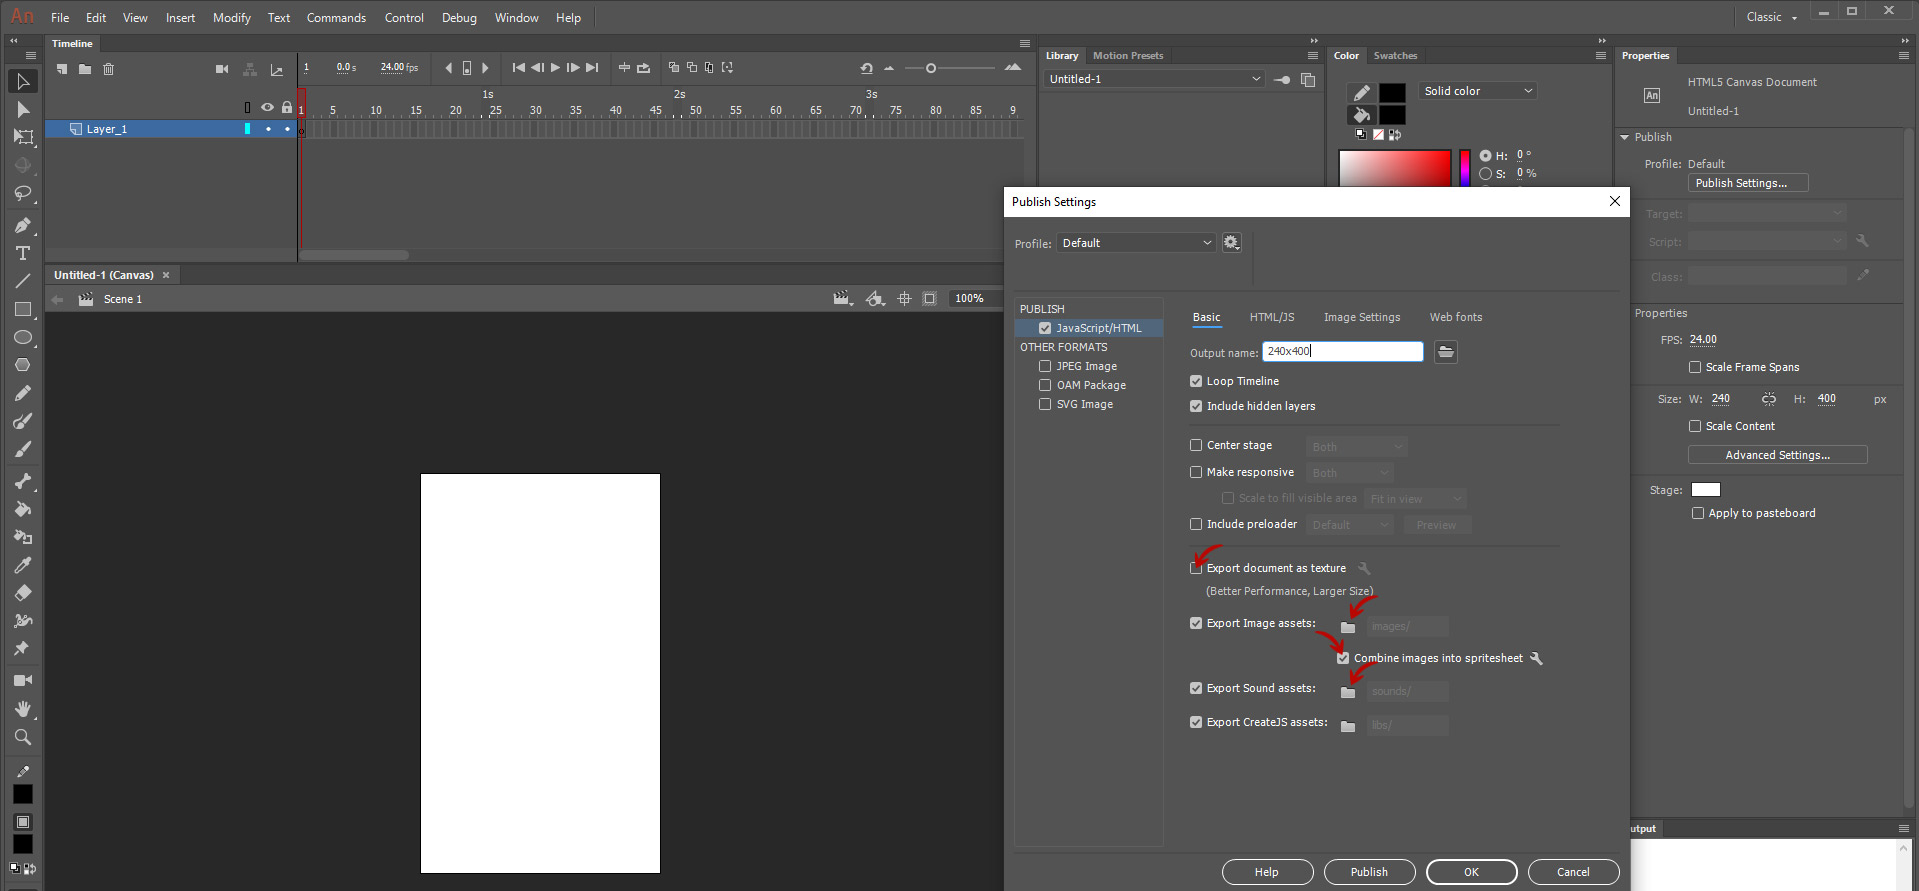
Web sites have technical requirements for organizing the structure within a folder. In some you can place files in a folder, in other places you can’t, in some places you can make a lot of graphic files, but in other places you can’t. For myself, I have developed a set of specific parameters that actually apply everywhere.When setting up a file, I always set the same set of parameters:
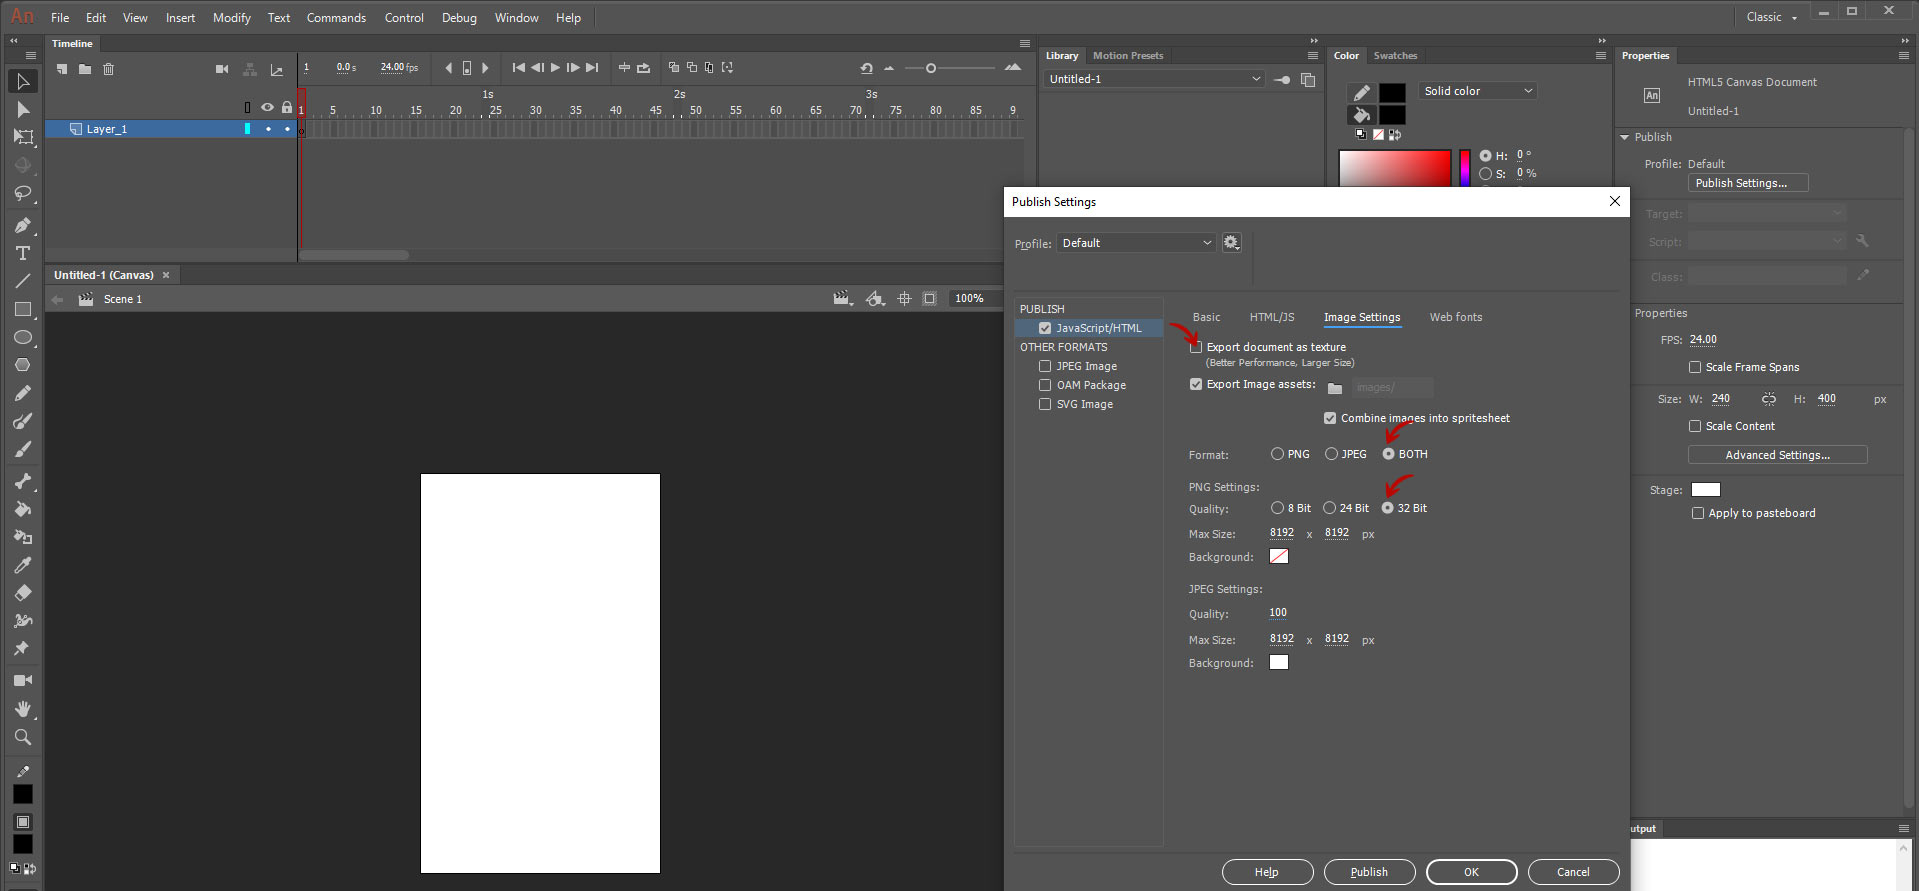
In the second image, we tell the program to export PNG and JPG images separately. Moreover, PNG must be exported with alpha channel support, and JPG must be exported with 100% quality, without compression.
Image compression tools are applied at the final stage, during image optimization.
It is especially worth paying attention to the fact that it is recommended to uncheck the “Export document as texture” checkbox, due to the fact that it quite often causes errors in the banner in different browsers. To the point where the banner may not be shown.
If you did everything correctly and sent the file for export, then as a result of the export you will receive the following set of files in the banner: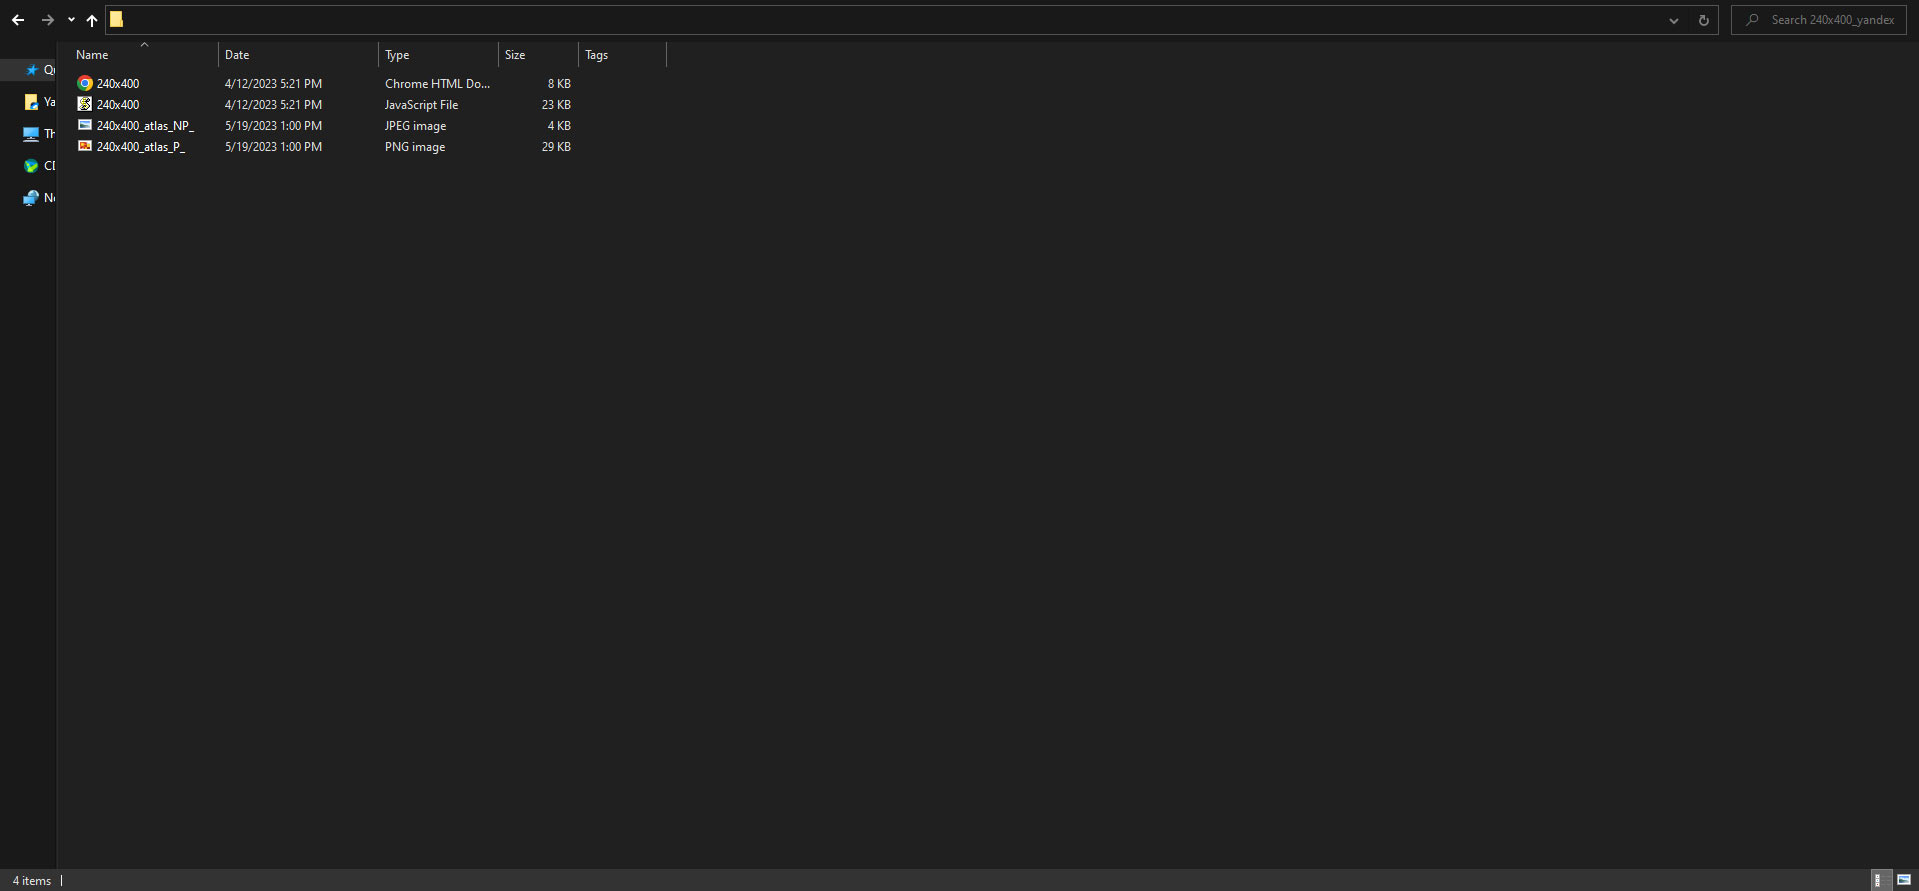
1. .html — file that starts displaying the banner
2. .js — a script that is responsible for filling the file with content and animation
3. .png — graphic file containing all PNG files from the banner, combined into one image, and supporting alpha channel
4. .jpg — graphic file containing all JPG files from the banner, combined into one image
This method of basic settings allows you to correctly transfer the banner content to the site and undergo moderation in 99% of cases.Now let's look at the export .html file and figure out what blocks it consists of, and what parts of it we can fill and change.
Let's open the .html file and look at it carefully: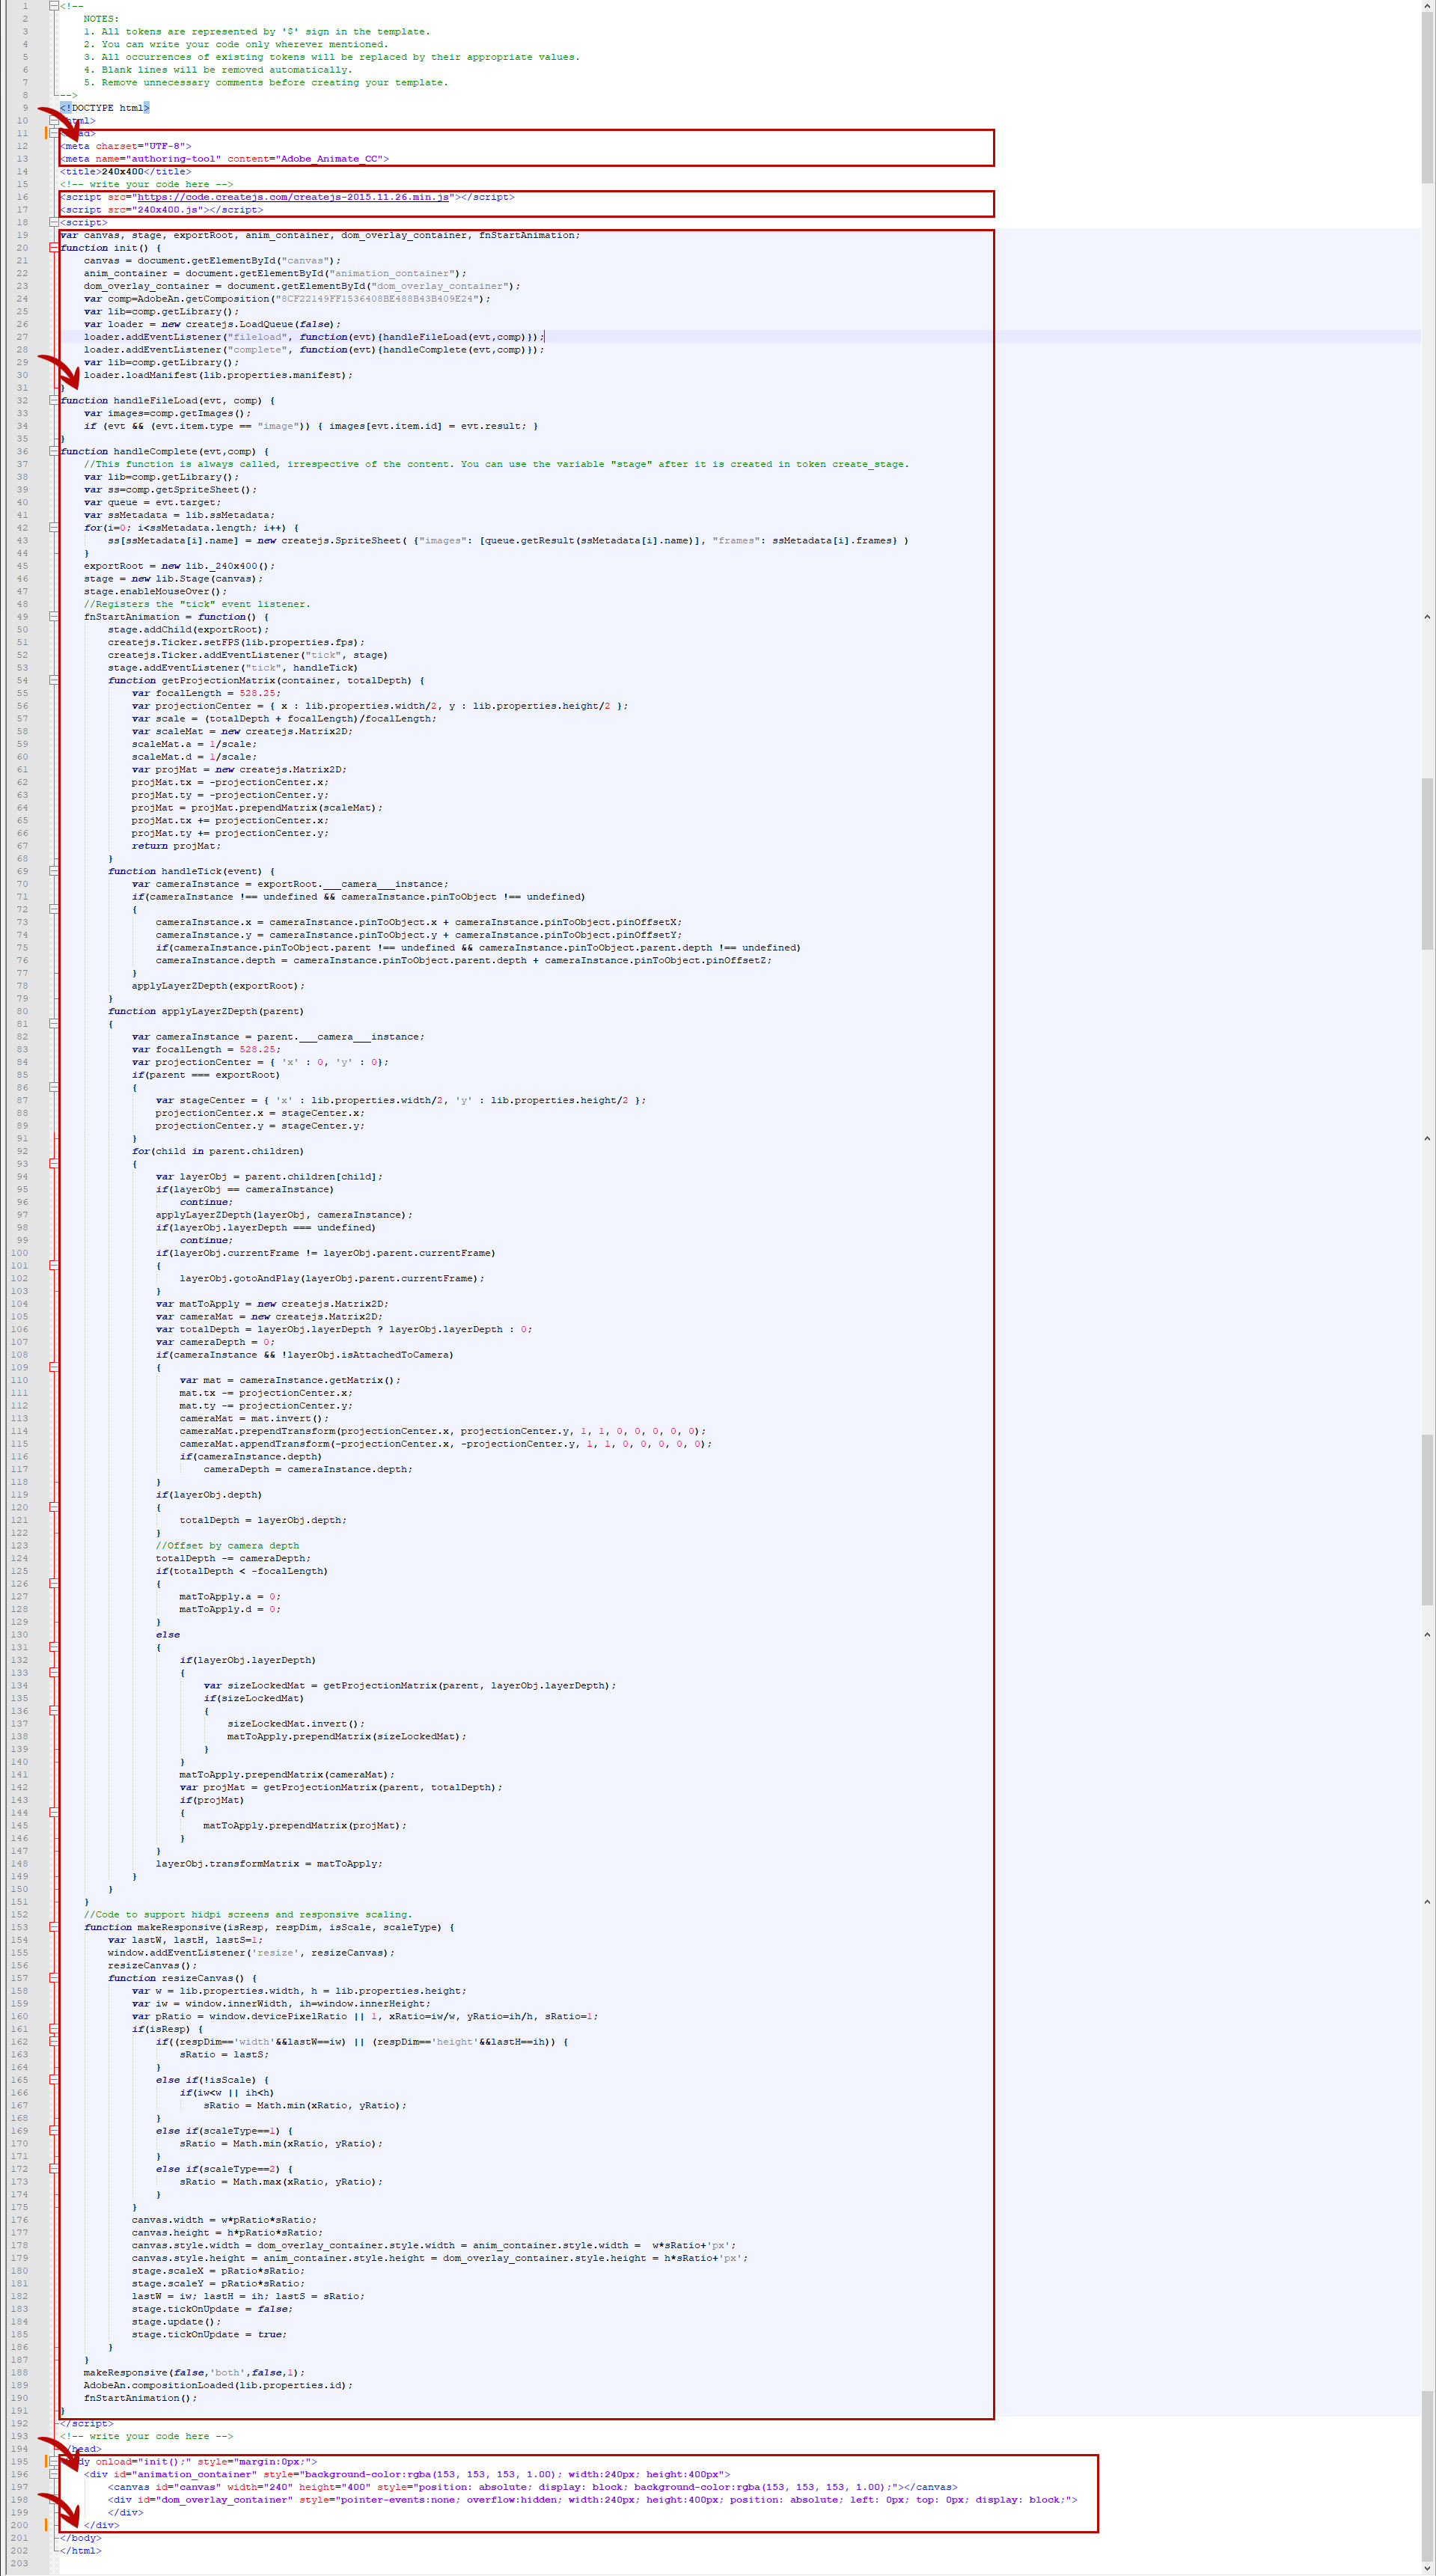
A slight deviation from the topic.
Platforms have a small number of options for changing the basic banner template to suit their technical requirements. There are actually 3 of them:
1. You need to insert meta data, comments or additional scripts into the “head” block of the banner.
2. In rare cases, make changes to the main banner script.
3. Add click processing and/or additional scripts to the “body” block of the banner.There are important blocks of code in the export .html file that you need to know. I highlighted them with red rectangles:
1. Meta tag area. Additional meta tags and comments can be added here. For example, most sites ask you to add the adsize meta tag, which tells the site about the size of the advertising banner (<meta name="ad.size" content="width=240,height=400">)
2. Banner script area. Here the site may ask you to include a banner animation script directly in the banner body, or to connect additional scripts. For example, Rambler asks to add a script <script src="https://dsp-rambler.ru/js/createjs/createjs-2015.11.26.min.js"></script>
3. Script for calling, initializing and setting up the banner configuration. As a rule, sites do not ask to change these scripts, as this may disrupt the operation of the animated html banner. However, there are exceptions, which we will consider a little later.
4. The last block is the canvas function, which causes the banner to be displayed on the web page.
Due to various technical requirements, we must know the places in the banner's html code that, if changed, will not disrupt the functionality of the banner.
I marked these places with arrows. Let's look at them:
Meta tag block.
Typically, the following data is added here:
It is possible to add adsize meta tags, which tell banner systems about the size of the banner. As a rule, it is indicated as a fixed banner size, or as a value of 100% for width and height stretches:

Also, special comments that are required by the site can be added to this block. For example, for weborama.

Block of additional scripts in the “head”.
In this block you can add or load additional scripts that the site requires. For example, Rambler requires the following content:

A block of basic banner scripts that should not be changed unless there is a strict instruction to do so.
This is the main block of initialization, loading and configuration of the html banner. You need to be extremely careful with him. There are many places where you can add additional scripts in this block, however, the safest place is right after the banner data is initialized. For example, the Adfox site adds its variables here.
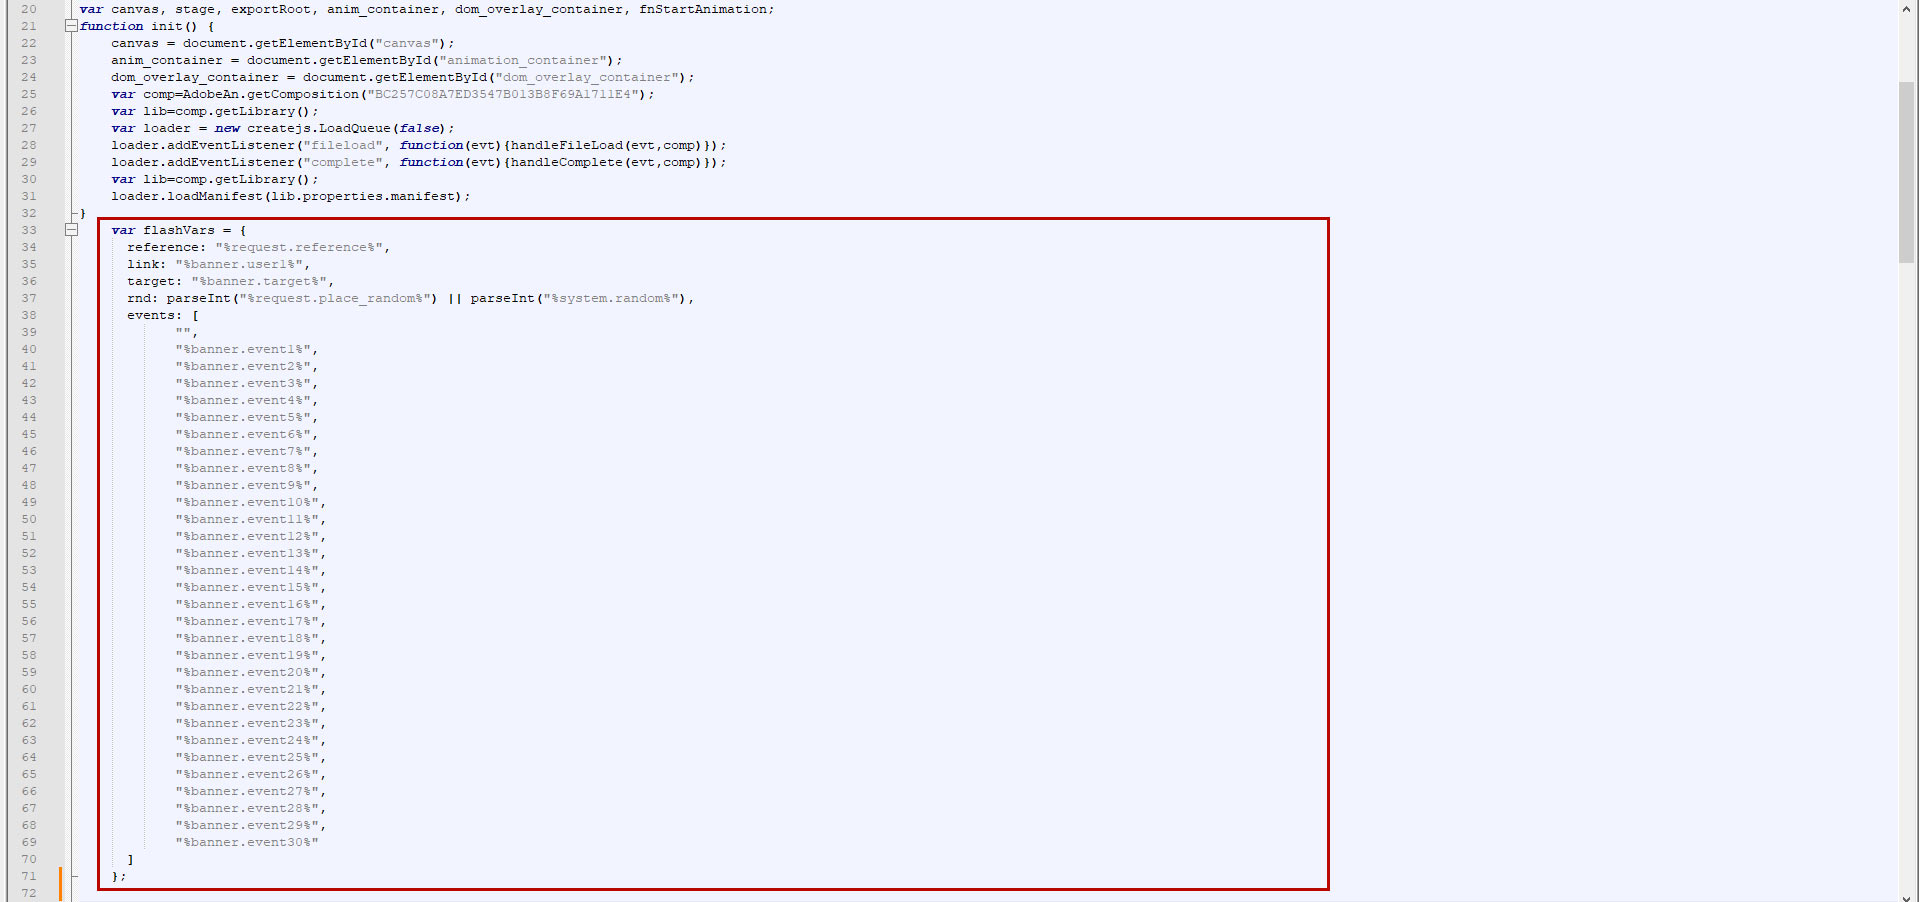
Block for processing a click and writing additional scripts in the “body”.
In this block, as a rule, the “click” on the banner is configured. There are quite a few ways to make a transition in a banner. Let's look at a few of them.
For example, Yandex asks you to navigate through a variable using a hyperlink, and also asks you to add additional scripts.

And Weborama asks you to make a transition using the means of processing the script event, which was included in the banner code earlier.

And there are sites that do not require any click processing at all.
A small conclusion.
Now we have looked at the blocks of the export file for an html banner, and the places where you can safely make changes and be sure that the banner will not break.
In fact, personally for me, these code changes resemble "programming" more than banner development. It's hard to deny the fact that when adding additional scripts, meta tags, and comments to multiple resizes simultaneously, it's easy to make a typo, error, or mistake.
When talking with other banner makers, I often asked the question, what percentage of errors do you have in your banners? And I heard quite strange answers in the form of figures from 5 to 15 percent, and for a number of bannermakers and studios such figures are the norm. Is it even worth voicing the idea that with so many errors we are experiencing a fairly large loss in finances when processing returned banners?
Personally, I'm not happy with this. And I began to look for ways to “minimize” any losses of all participants in the development of banners.
The best solution was to use presets. This is the automatic generation of scripts required by the site. In fact, I am removing for myself the “opportunity” of making a mistake due to inattention when starting banner development. But since it is possible to attach an incorrect preset, I needed to get another check at the end of development. Thus it appeared bannersbox.ru/en.
Currently, I submit the correct materials 99.9% of the time. And my customers don’t waste time troubleshooting errors.


